OneDrive For Zoho CRM - Help Document
Introduction
Introduction
Setup OneDrive Integration with Zoho CRM
Setup OneDrive Integration with Zoho CRM
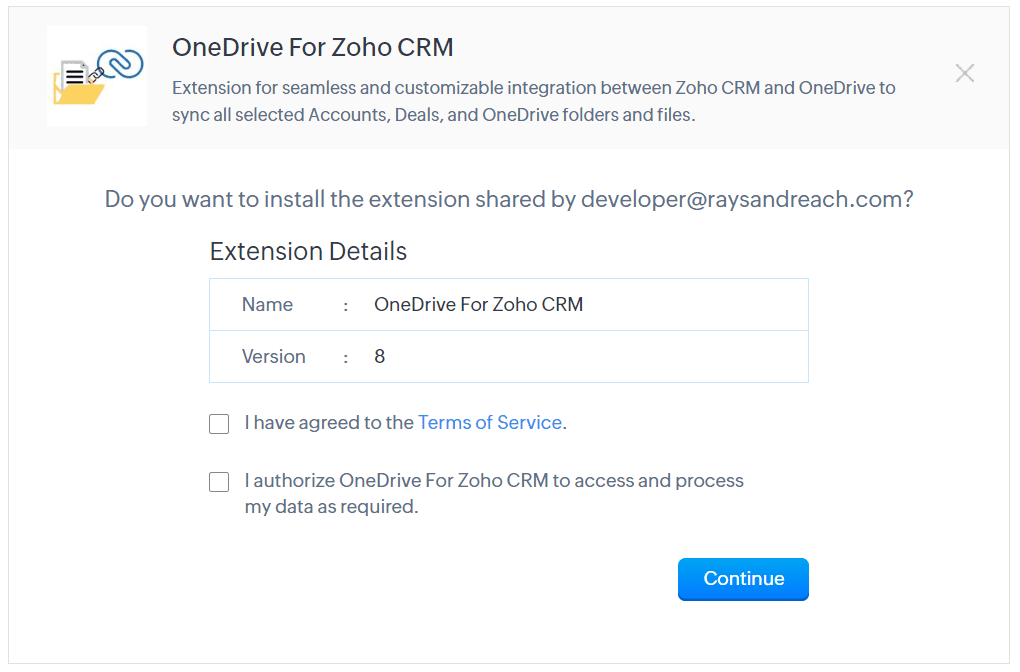
Install Extension
- Login to your Zoho CRM account.
- Go to Settings >> Marketplace >> All.
- Search for OneDrive For Zoho CRM.
- Select the extension and click on install.
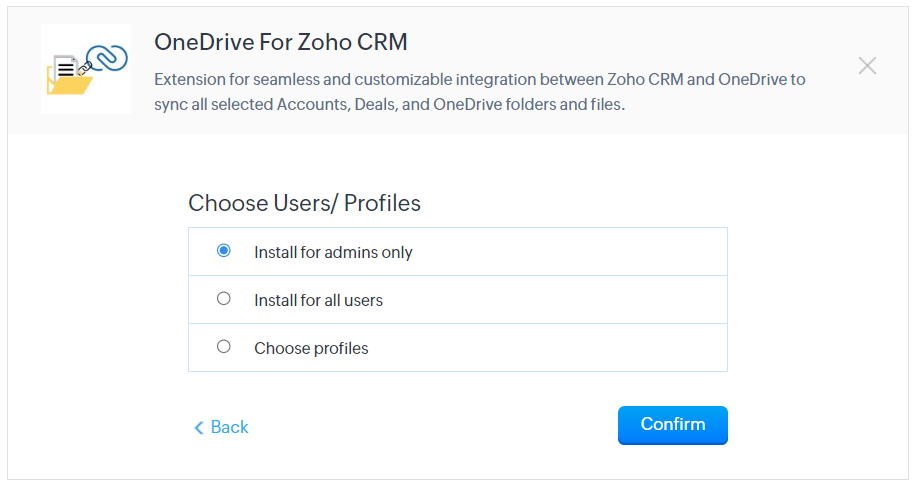
- Select check boxes and click on Continue.
6.Choose Users/Profiles and click on Confirm.
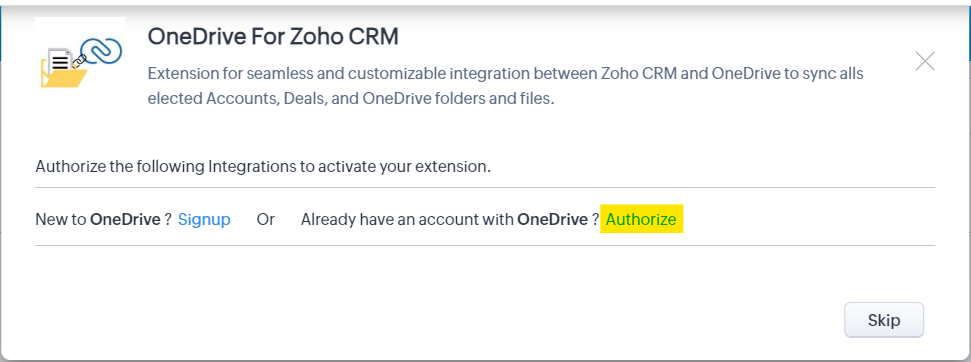
Authenticate Extension
Authenticate Extension
7. Authorize the integration by signing into your OneDrive account.
Installation Notes
Installation Notes
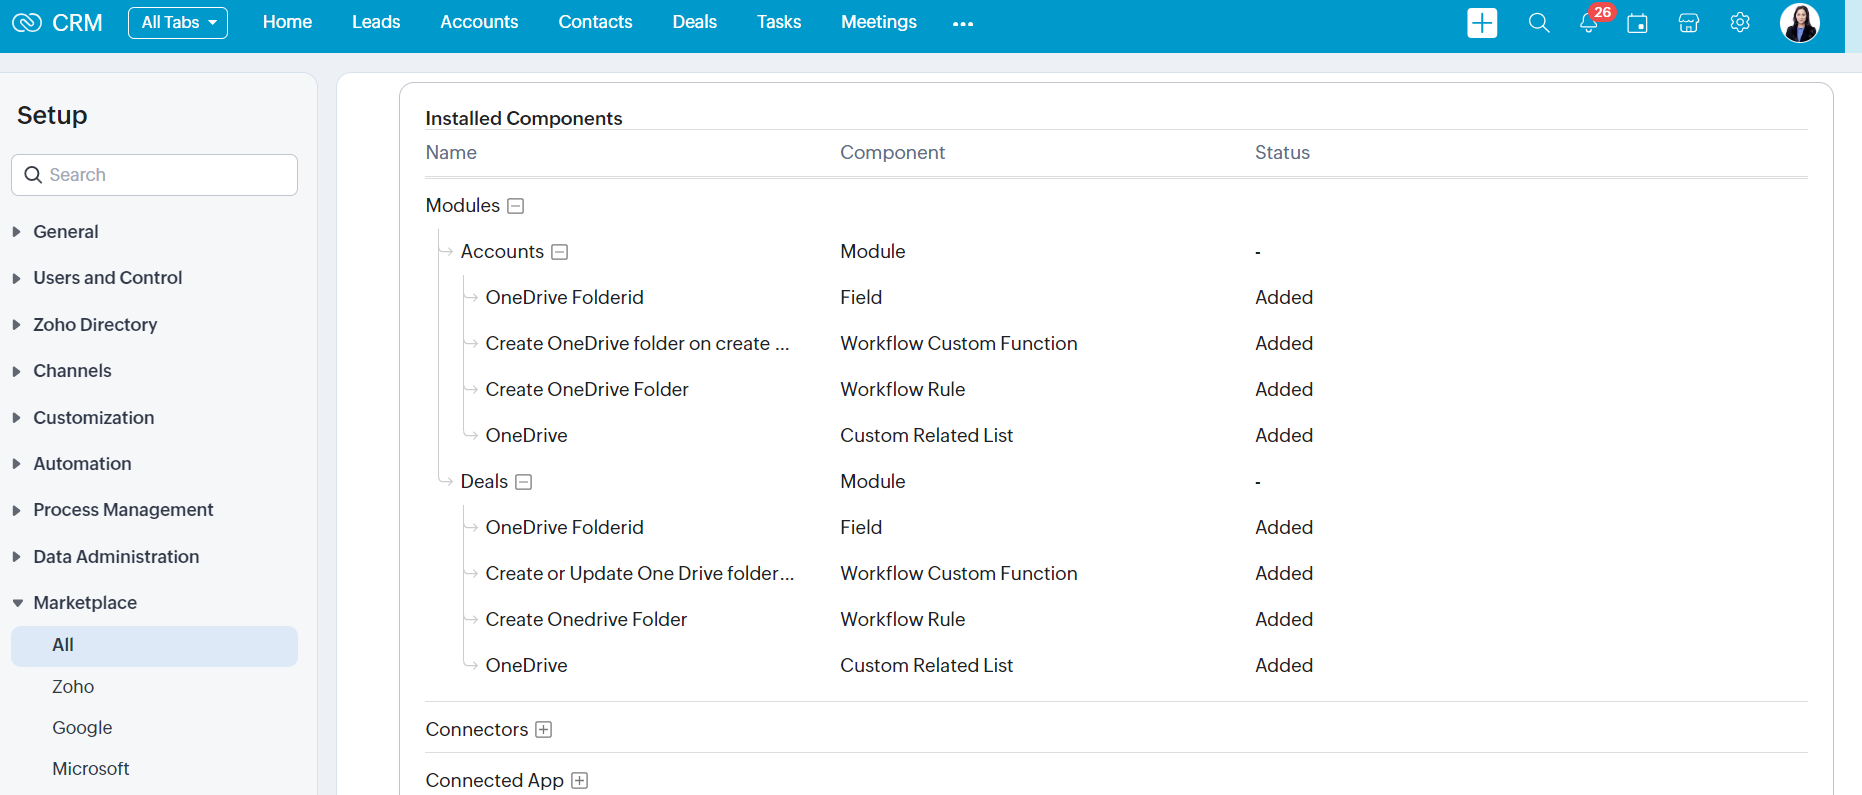
1. The extension will create the following in Zoho CRM:
1.2. Custom Related Lists
2. Details of created custom fields and custom related lists are available in Extension Details.
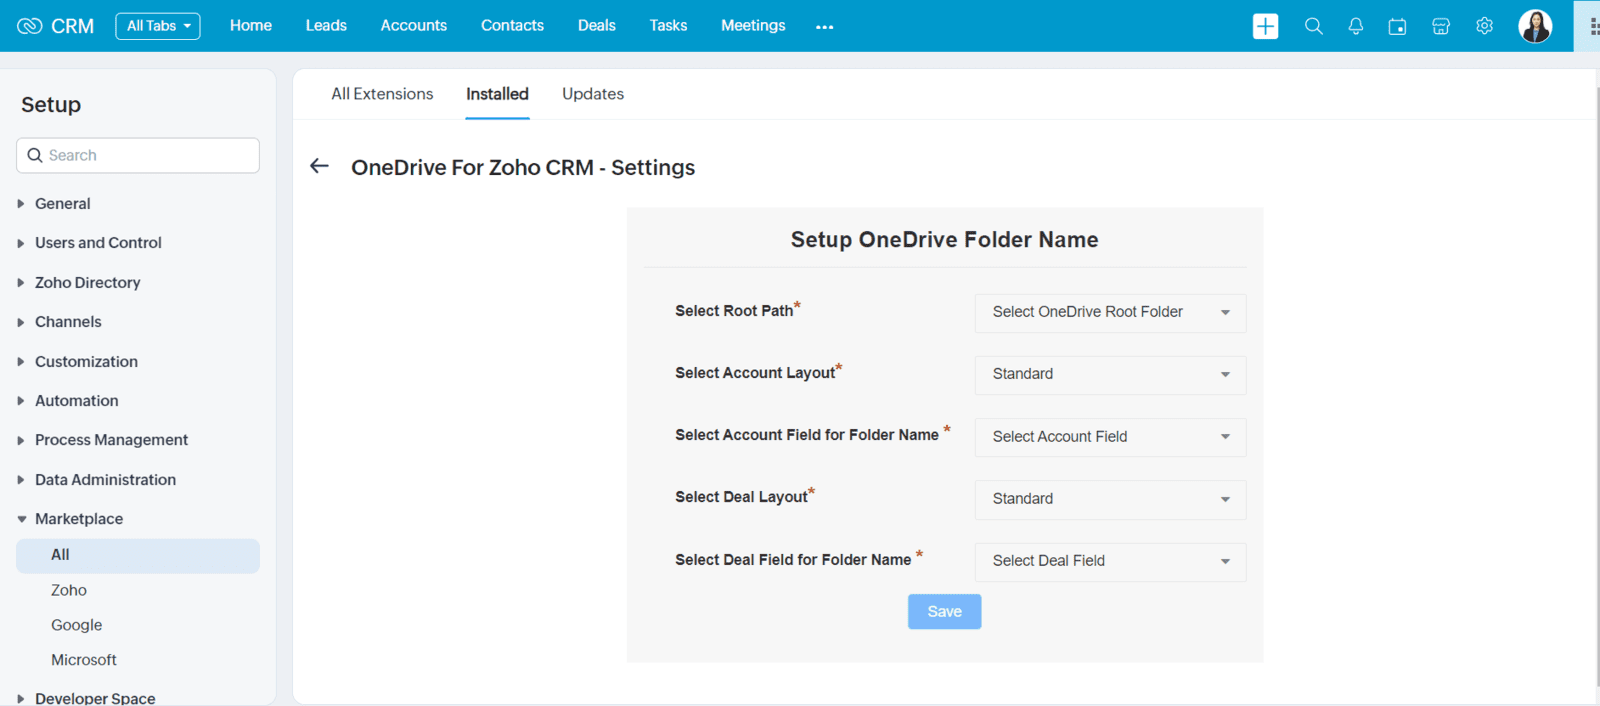
Setup OneDrive Folder Name
Setup OneDrive Folder Name
1. Click on Settings in Extension Details page.

2. Select OneDrive root path.
3. Select Account layout.
4. Select Account field of the chosen layout.
5. Select Deal layout.
6. Select Deal field of the chosen layout.
7. Click on Save.
Create OneDrive Folder From Zoho CRM
Create OneDrive Folder From Zoho CRM
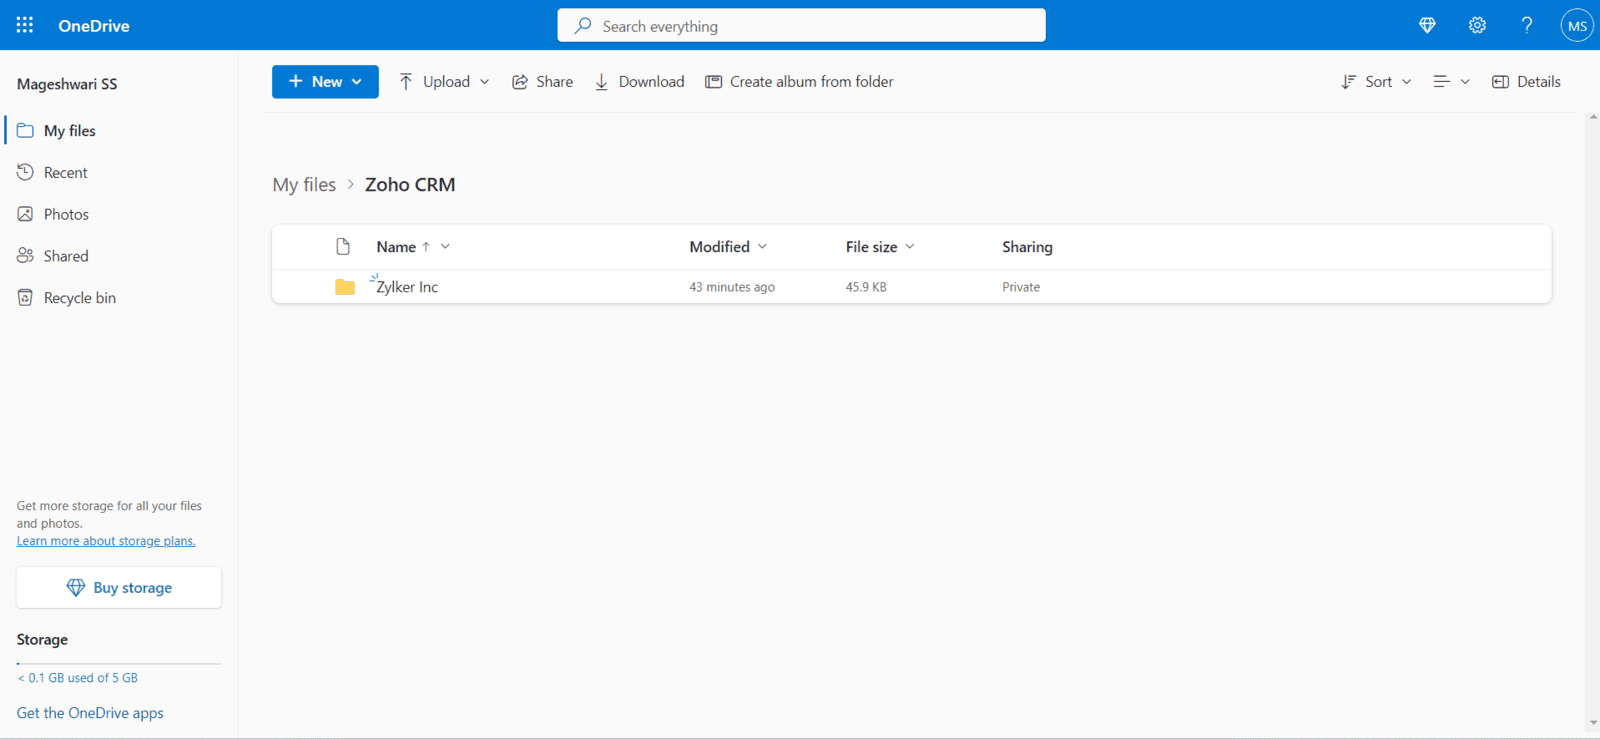
1. OneDrive folders are automatically created when creating an account or deal in Zoho CRM.
2. The created OneDrive folder is located inside the root folder, chosen in settings.
3. Folder names are based on the chosen field value of Account or Deal.
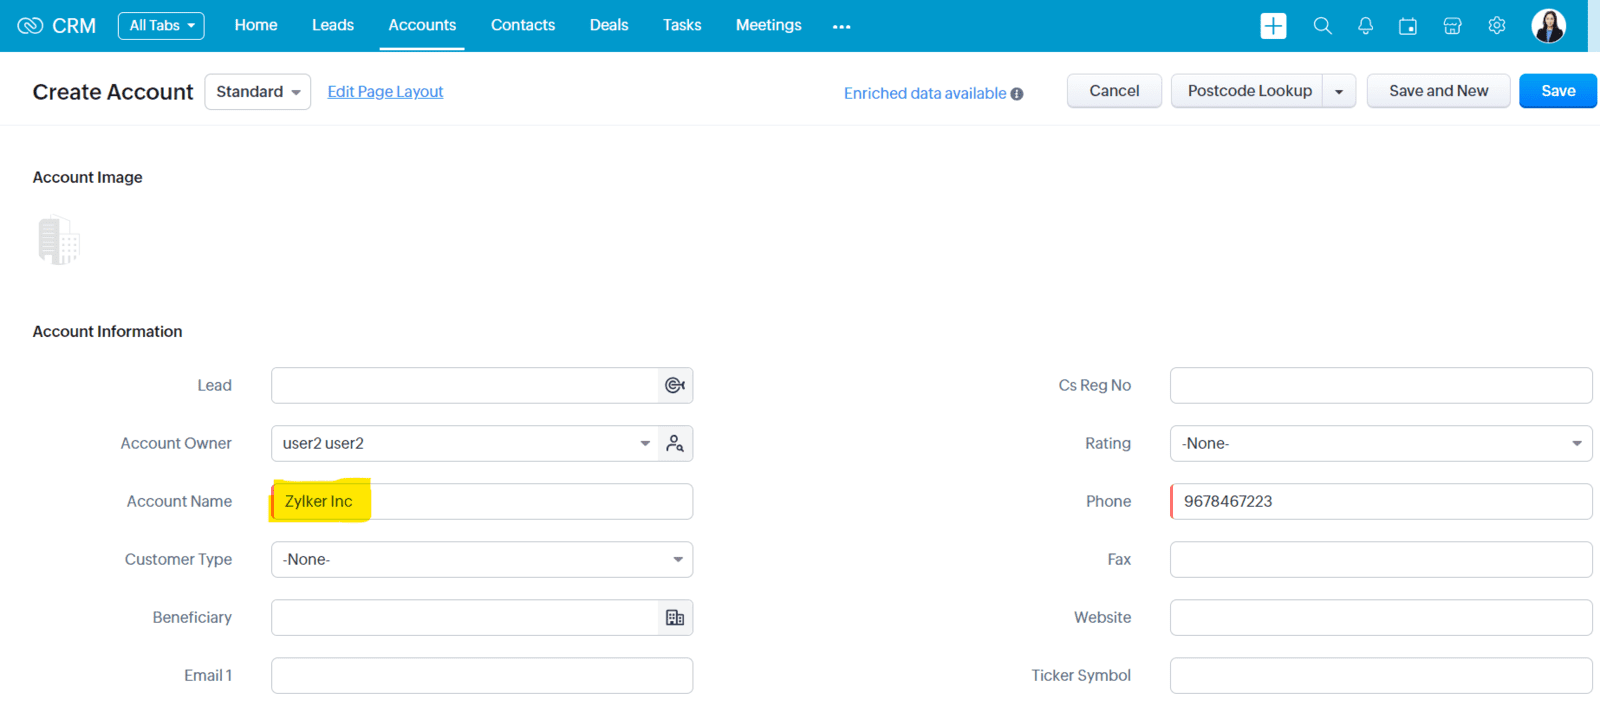
4. On successful creation of Account in Zoho CRM, the OneDrive folder is automatically created.
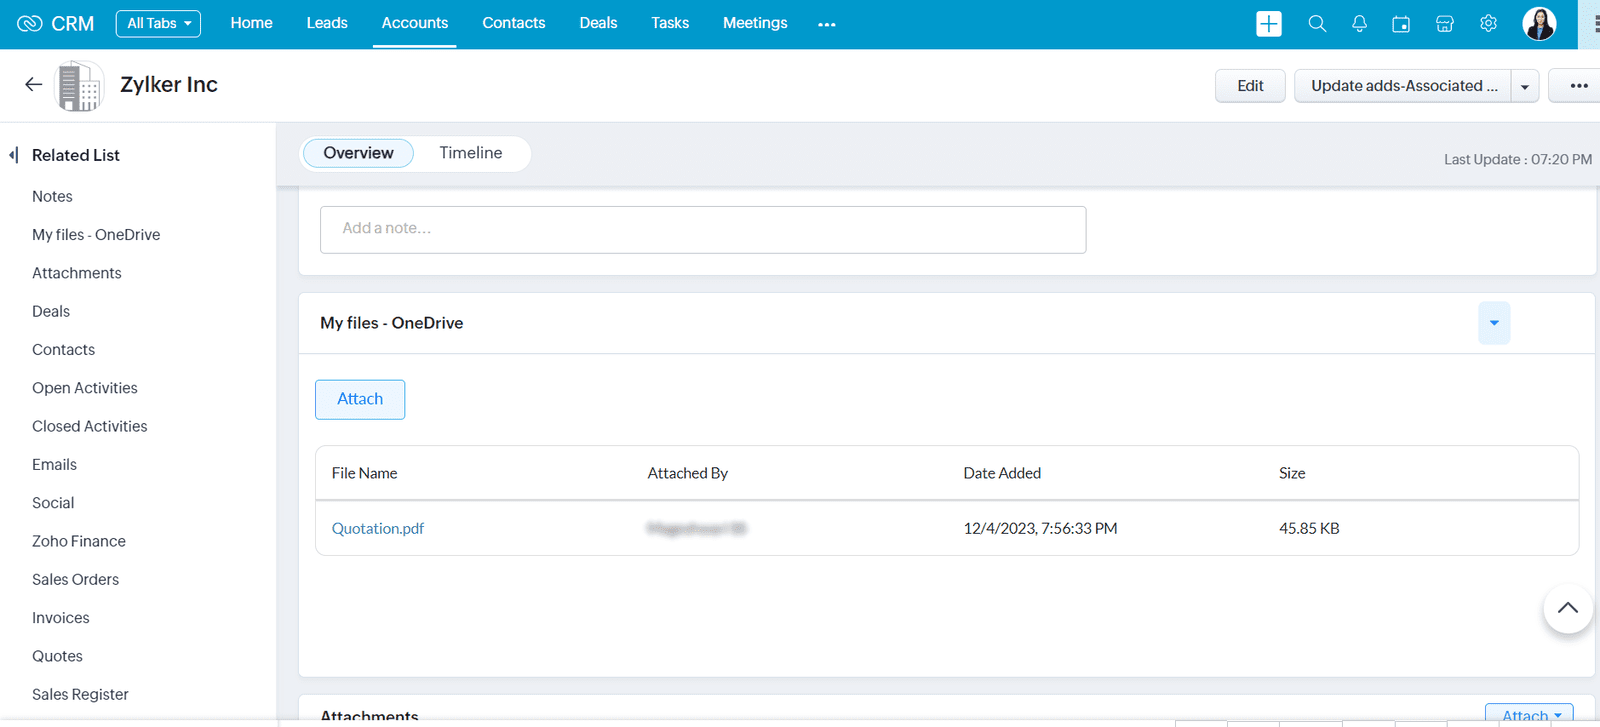
Upload and Sync Files to OneDrive Folder from Zoho CRM
Upload and Sync Files to OneDrive Folder from Zoho CRM
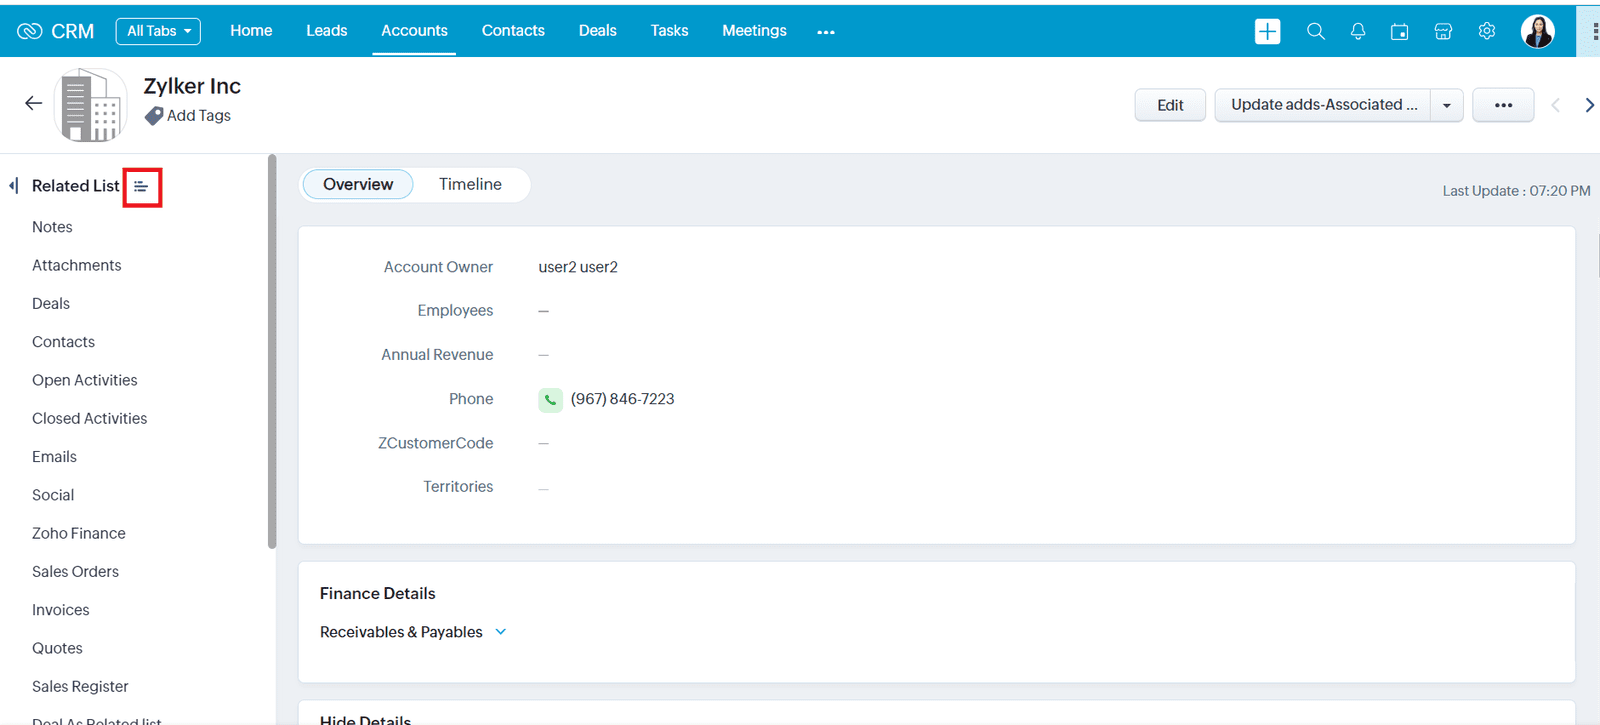
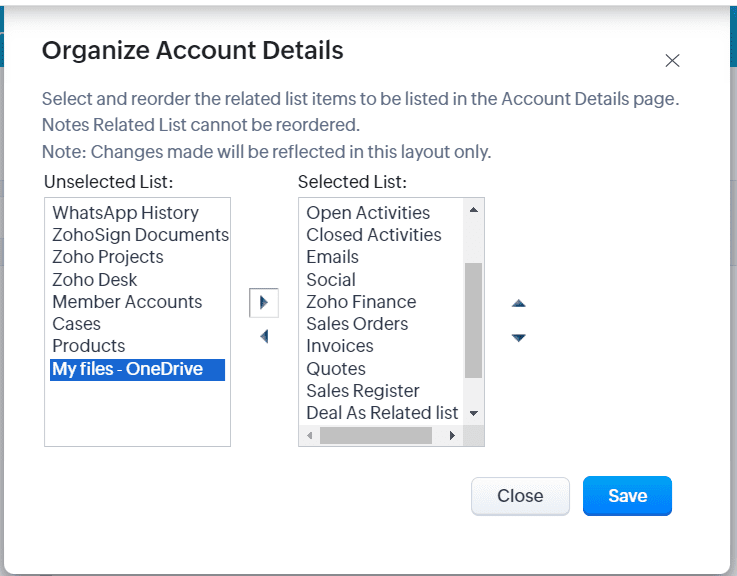
1. Open any account, Mouse hover on Related List and Click on Organize Account Details icon.
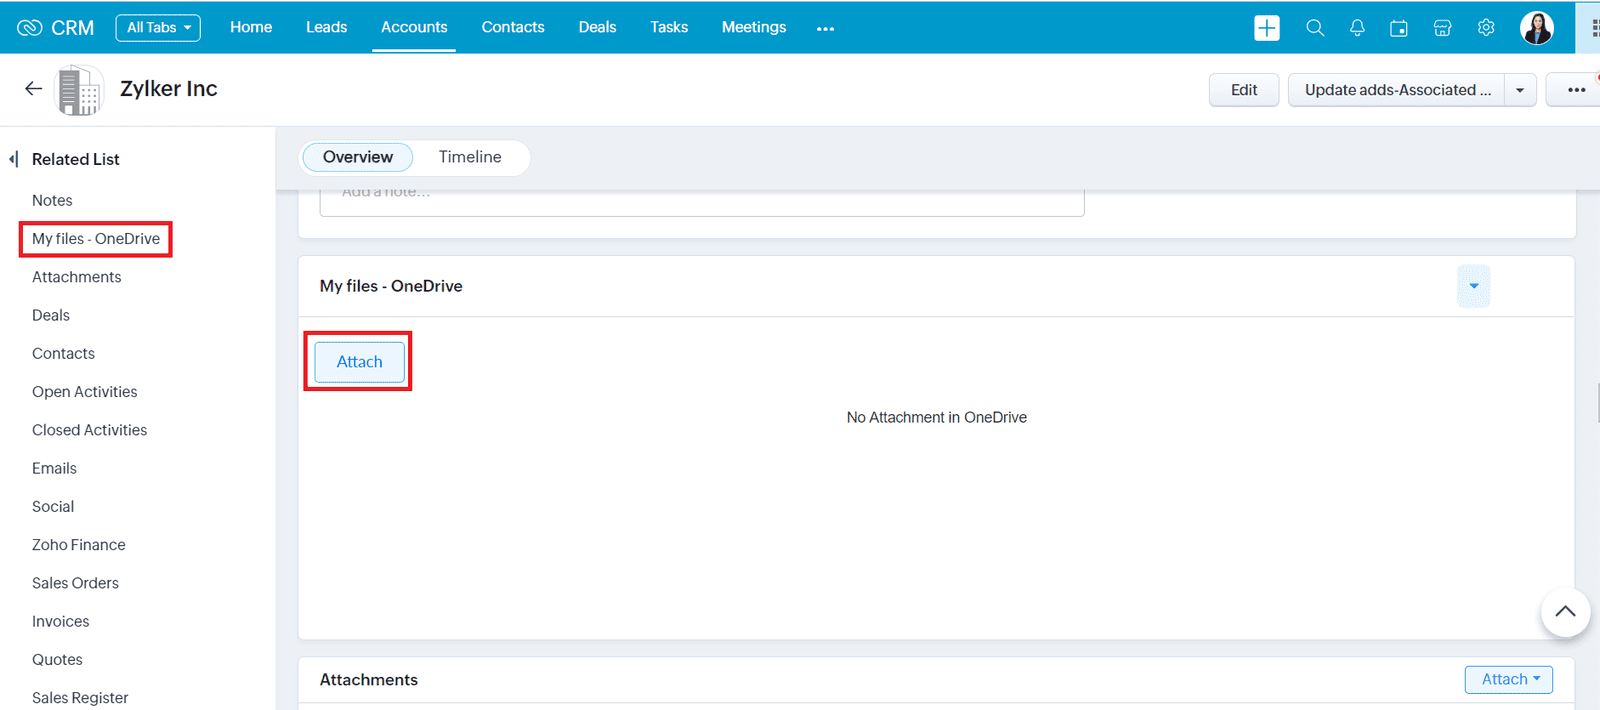
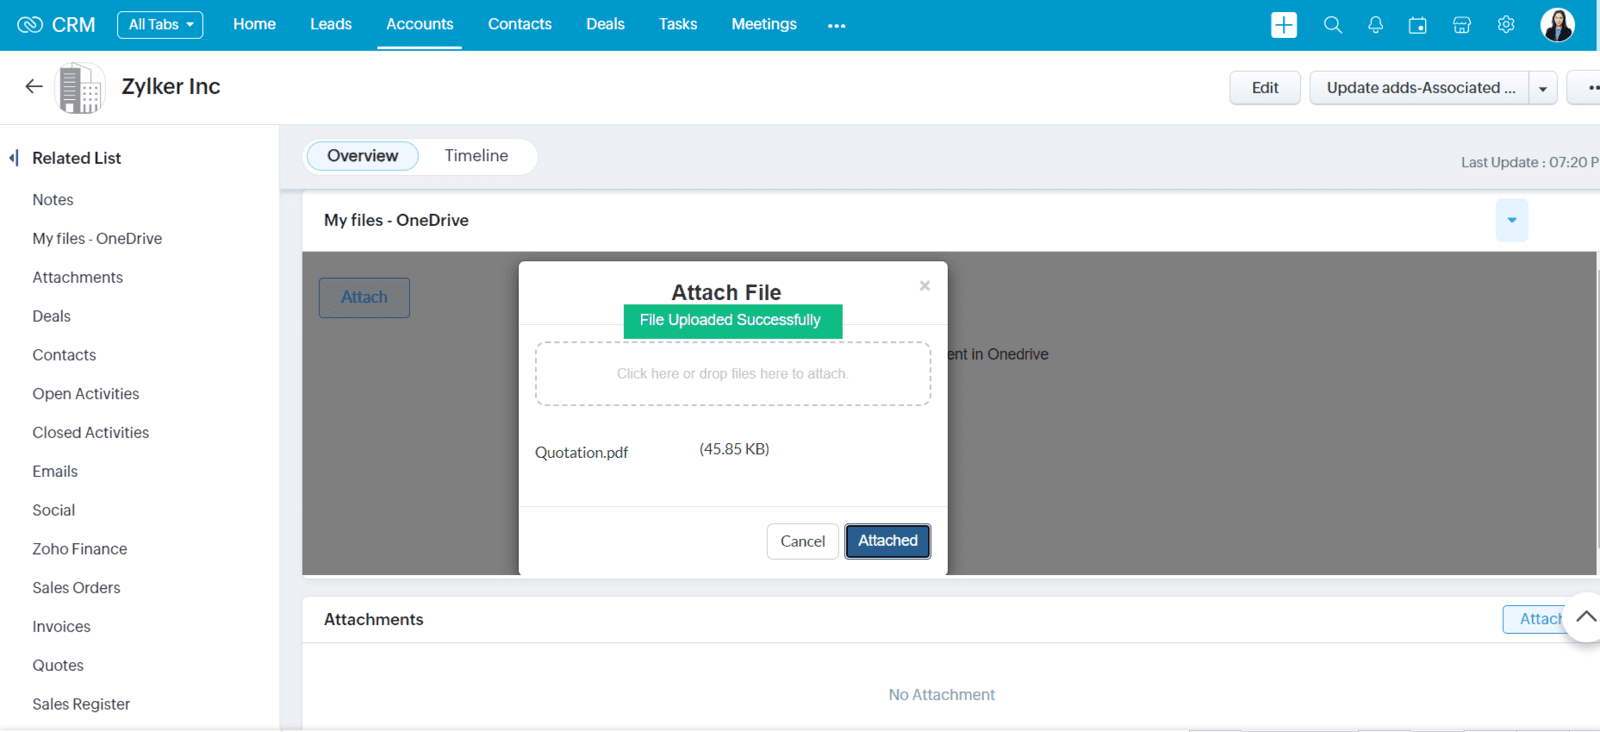
5. Attached files will be displayed in the OneDrive Folder Section.
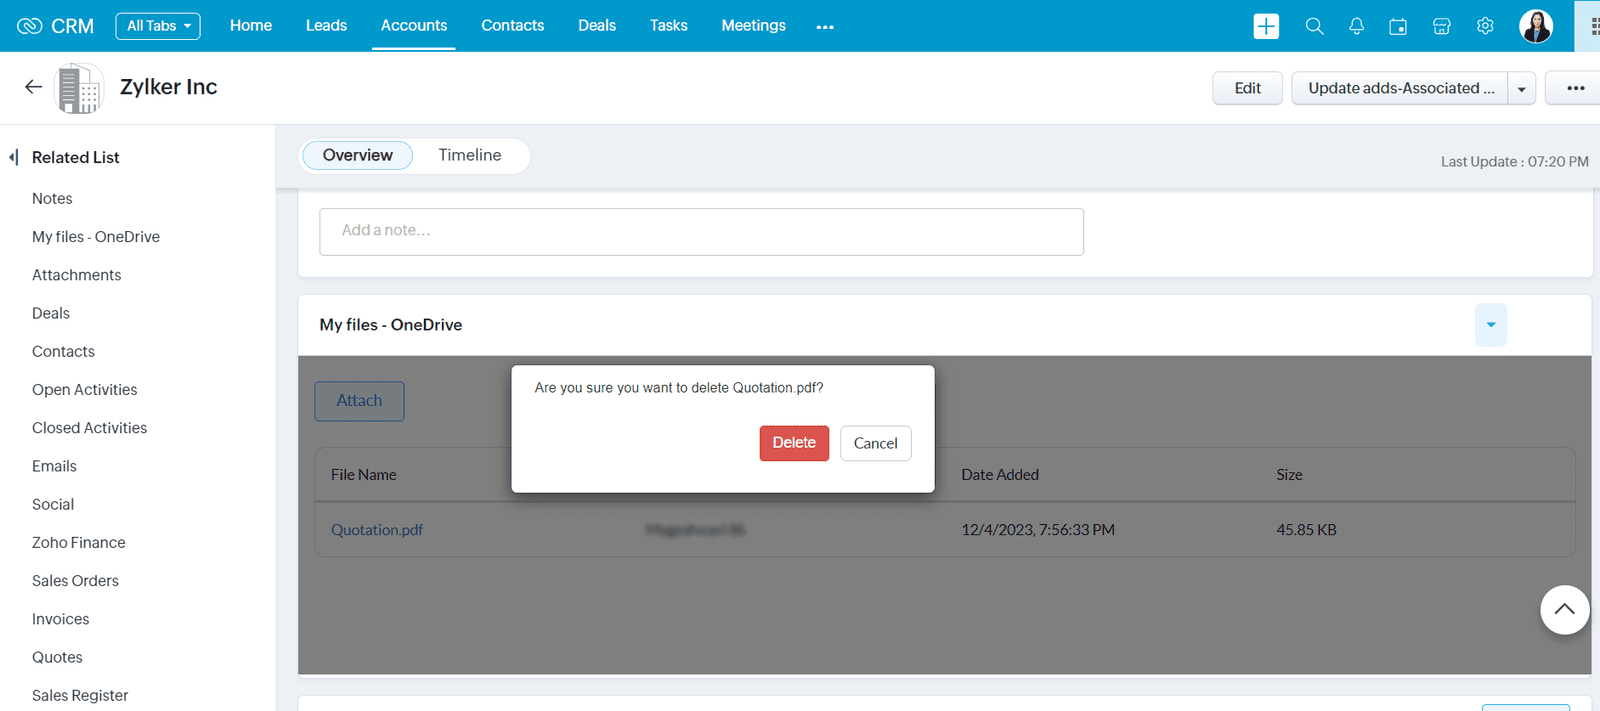
More Action On Files
More Action On Files
1. More actions icon (...) is available on all files.
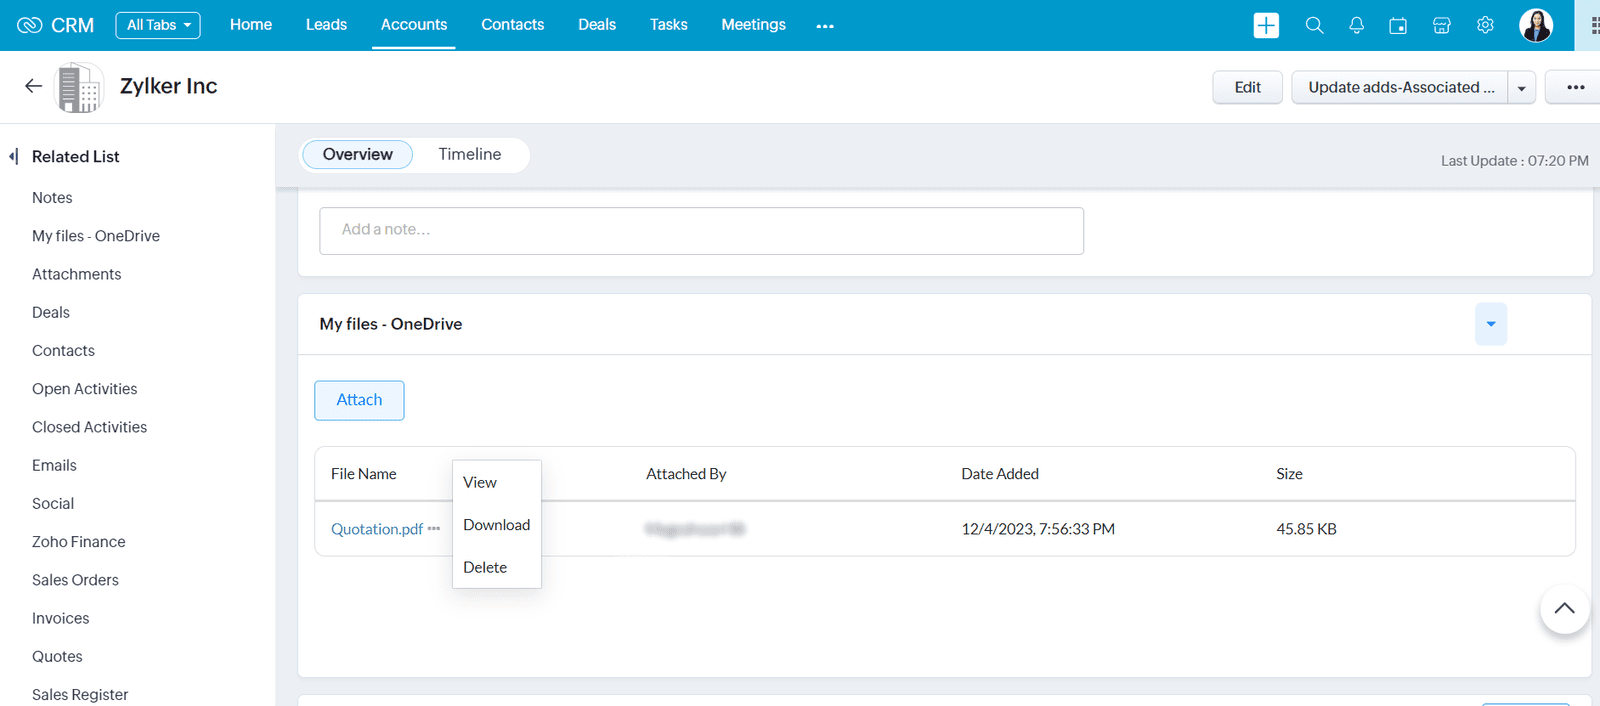
3. The file can be viewed using View action .
4. Download the file from Zoho CRM using Download action.
5.Delete the file from Zoho CRM using Delete action.